• Portfolio
  • About
  • Contact
  • Shop
mandee made

hand painted windows, signs & chalkboards

  • Portfolio
  • About
  • Contact
  • Shop

It's beginning to look a lot like Christmas...CRAFTING!

It snowed the other morning.

For me that means it's Christmas time.

So even though it only snowed for 3 minutes and it was mixed with rain and none of it stuck to the ground...it still snowed. And now it's Christmas time!!!

More specifically, it's Christmas CRAFTING time!!  Here are some of my favorite Christmas crafts from years past to keep you busy while I stretch out my glitter coating, wreath making, snowflake cutting muscles. It's important to ease into these things lest you pull something and have to sit out the rest of the season.


           D.I.Y. FIREPLACE         UGLY CHRISTMAS SWEATER

UPCYCLED CATALOG CHRISTMAS TREE


KID-FRIENDLY DIY SNOWGLOBES


I'd love to see any projects you make following my tutorials or any projects you've made on your own!  

Merry Christmas Crafting season!!
tags: before and after, christmas craft, custom, glitter, holidays, hot glue, how to, kids christmas crafts, kids crafts, make me, paper craft, trash to treasure, why dont you make me
Friday 11.15.13
Posted by mandee rae
 

Last Minute NO-SEW D.I.Y. Costume: Mini Hula Girl

Here's a last minute NO-SEW costume idea for you or your little one: 

What you'll need
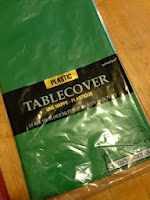
  • a green plastic tablecloth
  • scissors
  • glue gun/glue sticks
  • string/rope/twine
  • fringe (optional)
  • hawaiian flower for hair clip (optional)
  • shirt or onesie
  • felt for shells
  • blue marker


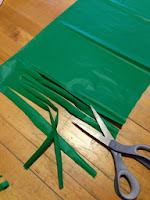
1. Open your tablecloth and cut it down to fit lengthwise around your waist and so that it's long enough to just graze the knee.  

2. Keep it folded over and begin cutting it into fringe.


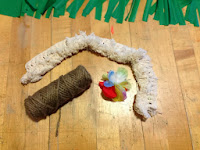
3. Once the fringe is cut grab your rope and fringe if you have some laying around.  I had this awesome piece of white fringe/tassles leftover from an old project.

4. Hot glue your twine onto the skirt at the fold and let dry.  Flip skirt over- hot glue the fringe to the front.
Your skirt is done.

Now for the shirt.

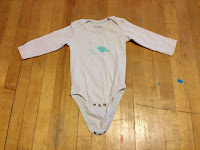
I'm using this off-white onesie for my daughter's costume.  It has a design on it but it should be covered by the shells so don't worry about it.  I'm also using left-over felt from her mermaid costume to be green and save a buck.


  1. Lay the felt scraps over the design to figure out where the shells will go.  Draw the shells directly onto the felt.

2. Cut out the shells and define them using any permanent marker.  I like this blue but you can use any color.  

3. Hot glue the shells onto the shirt.


Aaaaaand you're done!


Now slip the costume onto your little model and try desperately to get her to look at you.  
Good luck and HAPPY HALLOWEEN!!!


tags: custom, halloween, hot glue, mermaid, no sew, pumpkins, under da sea
Thursday 10.31.13
Posted by mandee rae
 

Powered by Squarespace.